diy chevron art

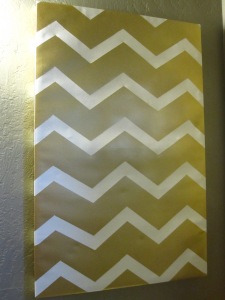
Some of you saw the repurposed chevron canvas project I was working on last night.. Well it’s finished and I’m super excited about it!  My bathroom has been desperately needing a makeover (I really wish I had taken a before picture), and I was able to do just that for the cost of spray paint (which I already had, actually) and some masking tape. Here’s how I did it..

I had an old canvas painting hanging in the potty room that I painted just barely off-white. Then I drew straight lines across the canvas with a light yellow pencil. The point of each zip zag comes to the line to give it a nice even look.

I didn’t measure out each line because nap time was almost over and I wanted to finish! You can’t tell in the end that the zig zags aren’t all exact, but anyway I would recommend measuring all the lines. Once I was all taped up I sprayed the entire canvas gold..

My favorite part! Once it dried, I ripped all the tape off like it was Christmas morning!

And here she is, in all her chevron glory! I also gave the mirror a fresh coat of paint to match. VOILA!

thrifty thursday

I realize my blog has been severely neglected. This past weekend I was honored to be a part of one of my best friend’s wedding. It was so beautiful, and so elegant, and we were able to capture some amazing photos.

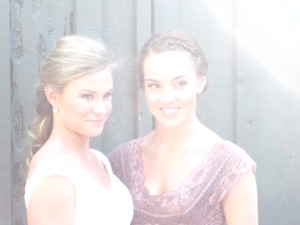
the bride and me

Although I’d love to write a post about the wedding alone, I’m sure you all have seen the pictures on my facebook. The reason for this post is the gift I made for her and the groom. I was inspired by this photo I saw, and I knew I had to make it.

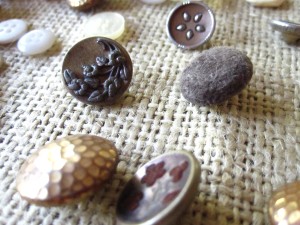
vintage buttons $0 (thanks Em)

Start with a color scheme you like. I went for neutrals. I also lined the mat board with burlap for an earthy look.

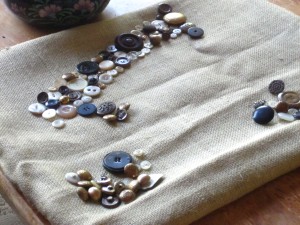
Line them up to start creating whatever shape it is you’re making. In this case it was a W for their last name.

Burlap from previous TT. $.99

You can start to see the W take shape.

wood frame $3.50

Unfortunately I was so excited to give this to her at her bachelorette party that I ran out the door without taking a final photo of the finished project! I’m kicking myself now. I promise that I’ll bug her for a picture as soon as she gets back from her honeymoon. (I swear it looks a lot better than the last shot)

Until then, just imagine and enjoy the simple beauty of a $5 project. Happy Thrifty Thursday!

thrifty thursday

here is my current list of cheap thrills.

upcycled toilet paper rolls - free

this is why I love the internet. my husband thinks I’m hoarding, but really I’m just waiting until I have enough of these to make something like this, or this.

miscellaneous scrap yarn - less than $2.00

it’s hard not to be excited about the coming of spring, and i’m all about color right now. the crafting possibilities with yarn these days are endless. check out what I’ve done with it already here

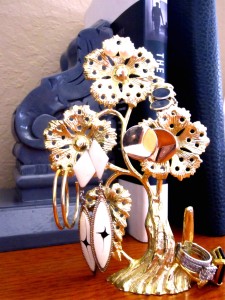
earring stand - $.99

this has been on my list of things to purchase, and I just happened to stumble upon this little gem at the thrift store the other day.

pink and white primrose - 2 for $3

a little color goes a long way under our shaded deck. these bright beauties are giving me good spring vibes :)

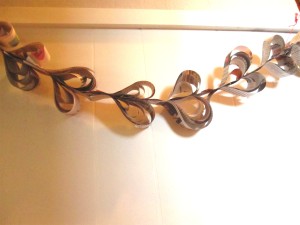
diy paper heart garland

lately I’ve been wondering what else I could be doing with all of the newspapers I’ve acquired because of my coupon addiction. after trying (and failing) at a few different ideas, I ended up making a single paper heart out of newspaper strips of various lengths.

the first heart

after that, I decided to make a bajillion more of these in various sizes. see how I did it

I grouped them together on the floor until I came up with this.

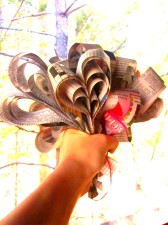
I also thought they would make a cute bouquet.

keep checking my blog for other diy valentine’s day ideas

how to: paper hearts

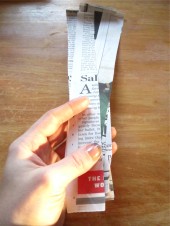
these paper hearts are so simple to make. if you couldn’t figure it out just by looking, follow these instructions

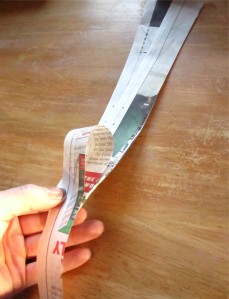
first, cut several strips on newspaper about 1 inch wide. the longer the strips the larger the heart will be.

next, fold down the outer strips to form the loops of your heart, making larger loops as you go. I used about 8 strips per heart (for you special people, that makes about 4 strips per side).

when you’ve created the shape you want, you can staple or glue (I used paper clips because it’s what I had) your strips in place. to make the garland, repeat these steps and insert the “tail” of your heart into the top of the next one and secure.

if you get creative with these hearts let me know what you did!